
Steal From The Rich! Crate Stealing Guide: How a Crate Run Works
How crate stealing works in Steal From The Rich!: where the Steal prompt appears, planning the carry home under pursuit, the 7-slot plot limit, and how appraised crates become per-second income.
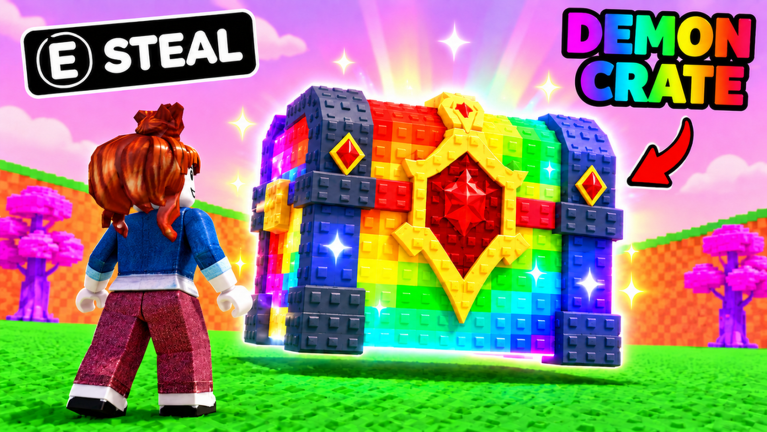
A crate run in Steal From The Rich! starts at a crate target in a wealthy area: walk up to the crate until an on-screen Steal prompt appears — the desktop example is E Steal — and use the input your device displays. Where those crates sit is currently described two different ways: walkthroughs show both walking into another player's base and using its (E) STEAL interaction, and taking crates that sit beside rich NPCs in named districts, while the official description only says "Steal crates from the rich." The pickup itself works the same way in every version — a prompt at the crate — so look for the prompt on whatever crate your district offers and start there.
The crate-stealing cycle at a glance
Roadmap
- 1
Steal a crate
Take a crate from a rich area using the on-screen prompt at the crate itself.
- Walk up to a crate until its Steal prompt appears (desktop example: E Steal)
- Use the input your device displays
- 2
Carry it home and place it
Bring the crate back to your plot — your plot starts with 7 item slots.
- Follow the return route you planned before pickup
- 3
Open when READY
Placed crates show a READY state and an Open Crate prompt; opening unboxes collectible items that each generate their own dollars-per-second value.
- Wait for READY, then use Open Crate
- 4
Earn
Placed, displayed treasures generate money every second — including while you're offline.
- 5
Train and repeat
Train Speed on the treadmill and expand toward richer areas for better crates, then run the cycle again.
- Raise Speed on the treadmill
- Push into richer districts for the next run
Starting a run: finding a crate target and reading the Steal prompt
Runs begin in a wealthy district, and the recorded cues for finding a target are consistent: a named area header such as "Gold Tycoon", blue-and-gold buildings, coin-shaped landmarks, and a gray approach road leading in. The target interaction itself is recorded as "Desktop E Steal beside the NPC-associated crate" — the prompt sits with the crate, not inside a menu.
Approach the crate you intend to take until you can read its interaction. Desktop play shows E Steal; follow whatever input your own device displays, since mobile and console controls may differ. Read the prompt before picking anything up, and use the crate's displayed interaction when it appears rather than assuming a menu button performs the same action.
Carrying rules and planning the return before pickup
Tips
Carry within your Speed
Only grab crates you can carry out at your current Speed. Treadmill training raises Speed so you can outrun enemies and carry crates out of wealthy areas — target the most valuable crate you can carry and escape clean.
Plan the return first
Walk the route back to your own plot before picking up a crate. Once you take it, the run warning and pursuit make the return the immediate task — a crate you can reach is only a useful target if you can also bring it home.
Orient before activating
Face back toward the street you came from and choose a building or terrain transition you can recognize on the return, so you know the next direction before carrying instead of discovering it mid-chase.
Scout on your first visit
Walk the approach and the return without picking anything up. If the street is familiar but you want more Speed first, use speed training and compare your preparation on the same route later.
During the run: pursuit, failure states, and retry
After pickup, a run warning appears and the district's chasers pursue whoever is carrying. Each run state maps to one next action:
- Inspecting a target — check its Steal prompt and the direction home.
- The crate is in your hands — follow the return you prepared.
- A run warning is visible — keep your attention on movement and the route.
- You've reached your plot — place the crate and read its appraisal state.
- You keep failing the same return — train more, then test that same journey again.
Recorded runs show both outcomes of the chase: chasers follow the carrier through the district ("they have the minions chasing after me", ending in a successful escape), and an outpaced attempt simply fails ("we're just not quite fast enough"). One recorded target area displayed a "recommended 900 speed" label — and the same recording shows a player with 13,000 Speed repeatedly failing that pickup and suspecting a bug. Treat a recommended-Speed label as displayed information, not a guaranteed success threshold. What happens the instant a chaser actually catches you isn't spelled out in current guidance, so treat escaping cleanly as the only reliable plan.
Finishing the run: placement, appraisal, and the loot handoff
Mechanic flow
- 1
Deliver
Return the crate to your base and place it at your plot.
- Set the crate down on your plot
- 2
Wait for appraisal
A placed crate shows an appraisal timer or a READY state with an Open Crate prompt; timer readings seen in recorded runs haven't matched up, so go by what your own crate displays.
- Come back when the crate shows READY
- 3
Open
Opening unboxes the treasure, which carries an item name, rarity, quality descriptor, a dollars-per-second value, and an odds label.
- Use the Open Crate prompt
- 4
Display
Opening gives you the treasure — displaying it is what completes this part of the loop and turns stolen loot into income.
- Show the treasure on your plot to earn its per-second income
Recorded gameplay shows a 4 kg crate handed to the appraiser and returned an "epic" result ("So, I guess the chances vary"), along with a timer reading of "seven minutes to open" that the recorder himself noted didn't match what the game displayed; a later crate was simply announced ready. Appraisal time therefore reads as variable rather than fixed — watch the timer on your own crate instead of counting on a set duration.
Capacity: the 7-slot starting plot limit
Collected crates are limited by plot capacity at the placement step of the cycle. Your plot starts with 7 item slots, and hitting the limit triggers the message "Your plot is full! (7 slots — upgrade at the sign!)". More slots are bought at the wooden plot sign, and the toast "Successfully upgraded your plot!" confirms the purchase. The 7-slot figure is the starting capacity, not a permanent cap — it's the "carry it home and place it" step where you'll meet the limit, and buying more slots at the sign is the documented way past it.
Related Guides
Base Building Guide: Placing and Displaying Stolen Treasures
Set up your base the right way: place stolen crates, display treasures, and keep every slot producing income.
How to Get Treasures: Verified Crate Route & Requirements
Learn the verified crate route to getting treasures, plus the requirements and gates before your first steal.
Plot Capacity: Slot Limits, Full State, and How to Add Space
Know what happens when your plot is full, how slot limits work, and how to add more space.
Treasures Guide: Label Fields, Uses & Recorded Entries
Understand treasure label fields, rarity, and display value so every slot on your plot earns the most.